International Meals – Indonesia, Part 2: Java

Two meals in three days?  Madness!

But we had purchased a bunch of fresh ingredients for our Sumatran meal that we wanted to make use of before they went off, and I’m going to be off playing board games all weekend. So here we go.

The meal will feature two dishes – gado-gado, which is mixed vegetables in peanut sauce, and soto ayam, an aromatic chicken stew.  Also shrimp crisps, which have a complicated process that we’ll get into later.

So first up, we’re making a peanut sauce, or sambal kacang.  The main ingredient for this is… well, peanuts.  Surprisingly, unsalted peanuts are a perennially challenging ingredient to source.  Our local grocery store has peanuts in chili-lime, barbeque, and possibly yak, but not, you know… plain.  As such, the only ingredient that we didn’t already have on hand for this recipe was something that in theory we should be able to get at the corner store, but couldn’t.  Back to the Asian grocer.

Peanuts acquired, so into the oil with them!

Frying peanuts

Those get ground up in a blender.  You can see how much the color changed in just a few minutes of frying.

Ground peanuts

To this, you add ground up shallots, garlic, and spices, and cook it down with some liquid until you get a nice thick sauce.

Peanut sauce cooking

Finished peanut sauce

Our other main dish is the chicken stew.  We’re going to start this dish by… wait for it… making a spice paste. This is definitely a recurring theme in southeast Asian cuisines.  Any evening where we have to bust out both food processors AND the mortar and pestle is a party, let me tell you.

Soto spice paste ingredients

Lots of the usual suspects in there – shallots, garlic, ginger, turmeric, and a bunch of spices.  I STILL haven’t gone to get candlenuts, but given how many recipes called for them, I probably should have. That paste gets fried for a bit with lemongrass, lime leaves, and galangal pieces.

Spice paste frying

We also dry roast some whole spices.

Dry spices cooking

Finally everything gets combined into one pot (and seriously, WHY didn’t I fry the spice paste in the same pot, to save one step in cleanup?) along with “good quality chicken broth.”  At least, that’s what the recipe said.  This is labelled in French, so that’s classy, right?

Chicken broth

It is unclear to me why “Western Family” a brand which as far as I know, only exists thousands of miles from Quebec, labels its products in French. Whatever. You can really taste the poulet.

Moving on, the chicken breasts get poached in this liquid until cooked, about 10-15 minutes for normal chicken breasts, and a little bit longer for the mutant monstrosities sold in north American grocery stores.

Meanwhile, we boil some veg to go under the peanut sauce.
Boiled veg

Everything I’ve read about gado-gado says that the exact veg aren’t really important, just that you have a good mix.  At the risk of being insensitive (like that’s ever stopped us), I would compare this, one of Indonesia’s national dishes… to nachos.  The point is that whatever’s on the bottom is mostly there as a vehicle to convey the topping into your mouth. Nachos exist to shove cheese and salsa into your face, and these veg are here to be something you put the peanut sauce on.

The other thing happening at this point is cooking some rice vermicelli.  Here’s the method for cooking rice vermicelli:

1. Pour boiling water on it.

That’s basically it. Ten minutes later, you drain the water.

With the chicken done, and now a lovely shade of yellow, it gets pulled out of the stock and shredded.

Shredded chicken

The stock is drained to get rid of the aromatics and whole spices, and boiled down to concentrate a bit.  Finally, the chicken and noodles are returned to the pot and warmed back up, and dinner is ready to be served.

Oh, except for the shrimp chips.  Every recipe I looked at for both gado-gado and soto ayam mentioned two things. 1. Here is a recipe to make shrimp chips. 2. Seriously, just get them out of a bag, though.

Shrimp chips in a bag

At least it’s an Indonesian bag, right?

It was finally time to plate everything up and have dinner.

Javanese meal

Doesn’t this look good?  Gado-gado on the left and soto ayam on the right.  Shrimp chips in a bowl and peach bellini beer in the glass.  That latter is probably not traditionally Indonesian, so let’s just talk about the first three.

The first three were great.  That soup is DEFINITELY what I want served to me the next time I have a cold. Unlike a lot of other dishes from Indonesia, this one is generally not spicy in and of itself, but is often served with spicy toppings.  But it really doesn’t need them to be appreciated – the flavor profile is complex and delicious. For the gado-gado, what’s not to love about a spicy peanut sauce?  (The vegetables were fine.  They did their job of moving the peanut sauce to our faces.) And no one opens a bag of shrimp chips the way we do.

Indonesia is continuing to make us very happy.  One more meal to go, from Bali, and this one will likely also follow in quick succession.

We cooked out of a book again this week, but here’s some recipes that are roughly similar to the ones we used:


International Meals – Indonesia, Part 1: Sumatra

We really do want to finish this project some day.  Honestly.  And there’s countries later in the alphabet that I’m eager to get to.  There’s also North Korea, but we’ll burn that bridge when we come to it. BUT…

When we consulted our friends with expertise in Indonesia, they gave us a LOT of ideas.  And it turns out that Indonesia is the fourth most populous country in the world, after India, China, and the USA.  We did four meals for India, and five for China, so why not at least three for Indonesia?  At least it’s broken up into discrete units, known as (checks notes) “islands.”

So for our first meal, we are starting with the island of Sumatra, and what is arguably the national dish, beef rendang. To accompany, we’ll be making a cassava leaf curry.  But first, to the library!

Indonesian Cookbooks

Not pictured – the eBook we also checked out.  The Vancouver Public Library has an excellent cookbook selection at the central branch, and it’s walking distance from our apartment.  This represents quite a few pounds (sorry, kilograms) of culinary expertise.

After the trip to the library, the next obligatory trip was to our go-to grocery store for southeast Asian stuffs.

Produce

Frozen ingredients

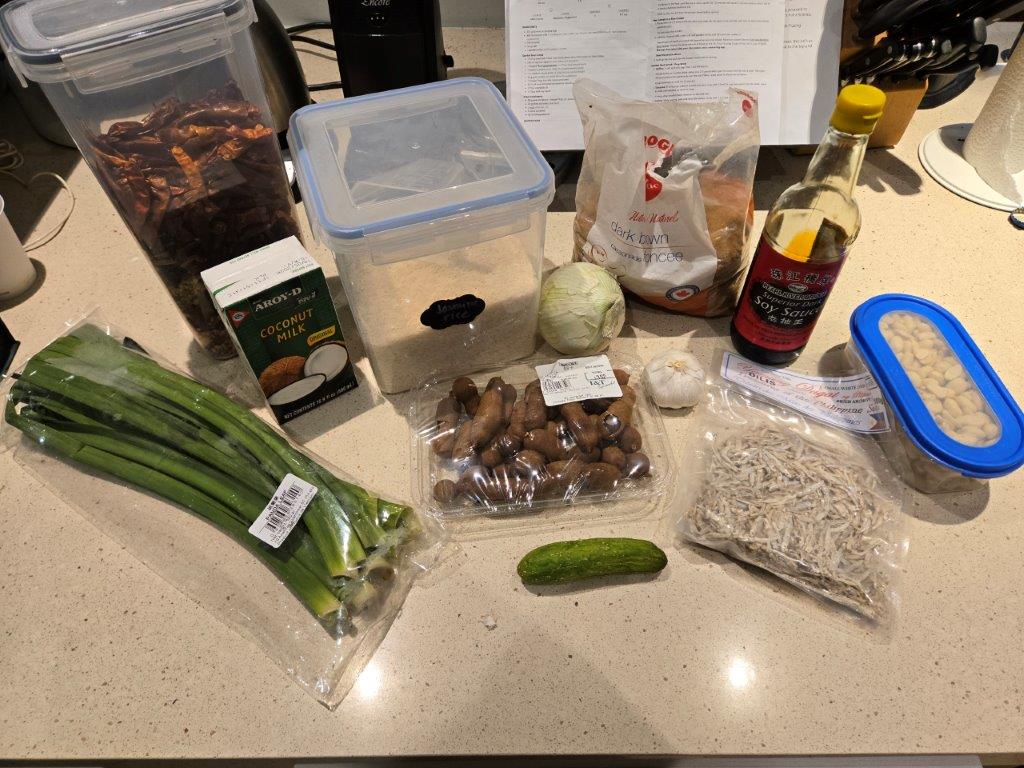
In the top picture, produce, including whole turmeric (upper left), because our cutting board, depressingly, is still the color it was when we bought it.  In the lower picture, frozen ingredients in their natural habitat – the sink.  Observant viewers may notice the first unforced error in that picture – ground cassava leaves.

This dish is supposed to use chopped or pureed leaves, and we do know where to get those, but I spaced and didn’t see that what you have in that bag is almost the consistency (as well as the color) of matcha.  Oh well, too late now, let’s power on and see what it tastes like.

First, we need to pre-cook some stuff.  In the top pan, the cassava powder is blanching. (Blanching?  Can you blanch a powder?) In the bottom pan, dried anchovies.

Cassava and anchovies cooking separately.

Next, we need to make a spice paste, so out comes the immersion blender. A mortar and pestle would be traditional, but the recipe literally does call for a blender.

Spice paste ingredients.

This paste contains red chilies, shallots, garlic, whole turmeric, ginger, whole coriander seed, and powdered cumin.  It does NOT contain candlenuts, because I didn’t want to make a separate trip just to get those.  Sorry.

Once our paste was ground, it gets fried with some whole aromatics – lemongrass, galangal, and lime leaves.

Frying spice paste

I think it goes without saying that this smelled amazing.  Next, you toss in some coconut milk and your cassava leaves, and let it simmer.  The final dish is SUPPOSED to be stewed leaves in a broth, but in our case it ended up with a texture closer to baby food.

Simmering cassava leaf curry

Still, if baby food tastes like this, sign me up for some sort of uncomfortable role play, because it was REALLY tasty. More on the final dish below.

Next up, beef rendang. “Rendang”, as far as I can tell, doesn’t have a literal translation aside from this dish.  It has an incredible amount of cultural significance in the region, which I encourage you to go look up, because I’m not going to be able to do it justice here. So what is it?

It is beef cooked in coconut milk and spices for a LONG time.  No, longer than that.  You cook it until ALL the liquid has either evaporated or been absorbed into the beef.  Over the course of the cooking process, there are a number of discrete stages, all of which look totally different from each other.  I was referring to it as going through phase transitions, but that was too nerdy, and I wanted Leigh to stop hitting me.

But to start, let’s make another spice blend!

Beef rendang spice blend

This one is shallots, garlic, ginger, turmeric root, chilies, and galangal, with a little coconut milk for lubrication.

And now, let’s just watch the magic happen.  For the first two hours, it looked like this:
Beef rendang, first stage.

A big pot of seasoned coconut milk with beef under the surface.  Once it had cooked for several hours and reduced a bit, it gets transferred to a wok to increase the surface area. And from here on in, I’m going to include the time stamps so you can follow the evolution.  It’s really magic:

6:26

Beef rendang in a wok

6:32
Beef rendang at 6:32

7:02
Beef rendang at 7:02

7:18
Beef rendang at 7:18

My photography skills are not increasing commensurately with the quality of the rendang, obviously.  But still – compare this color to the first picture.  And now compare it to the finished product, from 7:40.

Sumatran meal.

My goodness, LOOK at that color.  At this point just about all of the liquid was gone, and you are left with a thick, delicious seasoning coating the meat.  We abuse the term “depth of flavor” on this blog a lot, but… just LOOK at it! The cassava puree also turned out very nicely, and the tartness and creaminess was a good contrast to the beef, especially with the added textural contrast of the friend anchovies on top.  Also pictured, sticky rice.

And so that was our Sumatran meal.  Beef rendang is EVERYTHING that was promised, and although it takes a while to make, it is something I would absolutely serve to guests. The leftovers the next day were even better, as is often the case with stews

Next up – Java!

Recipes:

International Meals – India, Part 4: Eastern India

For our fourth Indian meal, we’re concentrating on dishes from the eastern part of India, in the areas near Bangladesh. I still haven’t transferred our pictures for our Bangladeshi meal from Facebook over to this blog, but for that meal we made a spicy fish dish, a red lentil curry, and a rice pulao.

Since I hadn’t looked this up before I planned this meal, we ended up making a spicy fish dish and a red lentil curry.  Welp.  The two recipes aren’t QUITE identical, and they were both tasty, so we’re cool.  Plus, we continued our bread-lentil-main-other pattern here, so there were two other dishes to make.

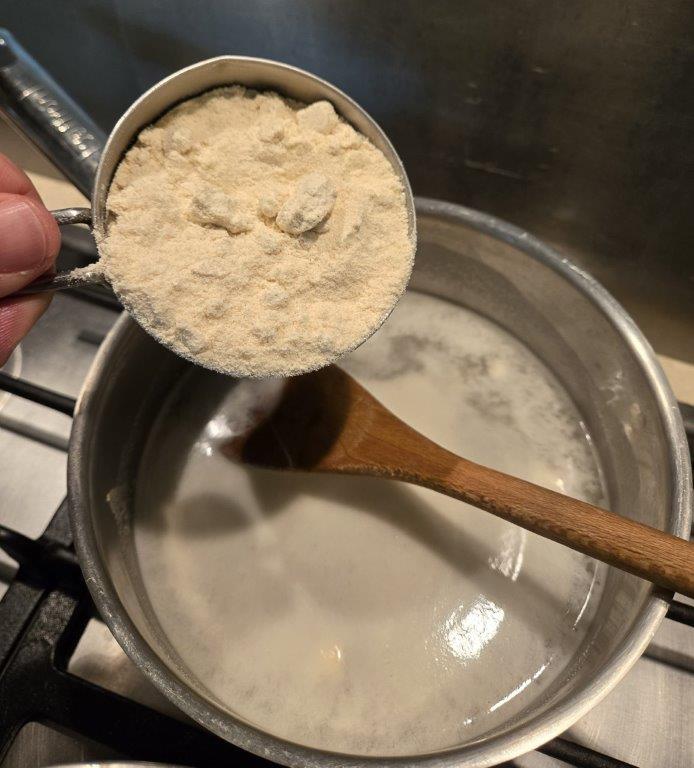
Let’s get started!  First off, our flatbread.  This is the one I’m least certain about the authenticity.  The best known bread from this region is luchi, but it’s deep fried, and we’re on record as being somewhat deep-fry averse.  So instead we found a recipe for a flatbread made with rice flour.  The actual method is pretty simple – first you cook rice flour and water in a pot, then once it’s cooled, you knead it into a dough.

To my astonishment, this powdery mess:

Cooked rice dough

did, in fact, come right together into smooth dough balls.

These then needed to be flattened out as thin as possible, without allowing them to fall apart.  While I never got pretty round shapes, I did at least get somewhat better as we went along. (That would obviously be left to right.)

Rice roti ready for cooking

Back to the cast iron on the grill.  They never got a LOT of color, but some of them DID puff up, so we were clearly doing something right.

Next up, lentils.  We’re using split red lentils for this one, or masoor dal. These things are great – we use them all the time for weeknight cooking, because they don’t need to be soaked, and they come together in a nice thick texture that’s delicious with rice.

Indian cooking can involve making really complicated spice blends.  Toast this, grind that, mix in the other thing, for upwards of as many as twenty ingredients.  But for THIS region, the dominant blend is called panch phoran, and couldn’t be simper.  Take five whole spices, and mix them together without cooking them.  The five spices are fenugreek, nigella, cumin seed, mustard seed, and fennel seed.

We have this adorable little container that I just keep refilling as we run out.

Panch phoran

This lentil dish uses the standard process of “cook lentils in one pot until done, make seasoning in second pot, put seasoning in lentils.”  Seasoning in this case consists of the aforementioned spice blend, along with onions, tomatoes, ginger garlic paste, and chilis.

Lentil seasoning

Finally, let’s talk fish.  There’s two ingredients that required a little planning here.  First is the fish itself.  Rohu is a type of carp, which swims around in solid rectangular blocks of ice, and frankly, seems to be trying just a LITTLE hard to ingratiate itself.

Packaged rohu fish.

WE’LL be the judge of what we like, fish.

The other key ingredient for this dish is mustard oil.  Now, while people in Bengal have been cooking with mustard oil for millennia, it contains high levels of erucic acid, which is potentially linked to heart disease when consumed in large quantities.  As such, it is illegal to sell it for cooking purposes in the US and Canada.  On the other hand, it’s perfectly legal to sell exactly the same oil as hand lotion.

Mustard Oil
“External use only.”  Nudge nudge, wink wink.

Figuring that making the occasional dish with this stuff will likely not kill us, we decided to go ahead and make macher jhol, a tasty fish curry.

The fish steaks, once freed from their icy tomb, were rubbed with salt and tumeric, then quickly seared in the oil. Once they’re ready, you make a sauce with tomatoes, onions, garlic, and spices.

Fish curry in progress.

After the sauce has reduced for a while, you put the fish back in to finish cooking, and it’s time to bring the whole meal to the table!

Eastern Indian meal
You may notice four place settings here – that’s because we once again had friends!  Leigh’s colleague Laurel and her husband were kind enough to join us and bring a lovely bottle of wine.

And the meal was excellent, if we do say so ourselves.  The dal was creamy and super flavorful, the fish had a lovely bite to it without being overwhelmed by heat.  The bread had a bit of an unusual texture from the rice flour, but it was a perfectly good scoop for shoving food into our faces.

And finally, it was time for desert.  We made chhena poda, a type of cheesecake that can be made with either chhena, a fresh curd which we didn’t want to make, or paneer, which we could just buy. The cheese is blended together with jaggery (palm sugar) and a little cardamom and rice flour.

Chhenna poda in process

To bake, you line a tin with banana leaves and brush them with ghee.

The final product has some of the “squeak” of fresh cheese curds, and is sweet and delicious.

This thing is also so ludicrously easy to make, we’re going to have to bear it in mind for future potluck situations.

So – that’s our whirlwind tour through India.  For blog purposes, anyway – it’s going to continue to be one of our staple cuisines for regular cooking.  (We literally made another dal recipe in the three days between the time of this meal and when I got around to writing it up.)

Next up, Indonesia, and we have friends with THOUGHTS and FEELINGS on that topic. Can’t wait!

Recipes:
Bengali Masoor Dal
Apas (Rice Roti)
Macher Jhol (fish curry)
Chhena Poda (cheesecake)

International Meals – India, Part 3: Southern India

For this meal, we’re heading to the land of dosa!  We’re not MAKING dosa, of course, just heading to the LAND of dosa.  However, we are going to make the same kind of batter you use to make dosa, and then we are going to completely fail to make a different kind of bread with it.

Spoilers.

For this meal, we attempted to continue our “main-side-lentil-bread” pattern from the previous two. But in addition, we added the pressure of inviting guests to come share the meal.  Having guests for these things is always a bit of a crap shoot – we LOVE sharing the meals with other people, but since it’s almost always food we haven’t cooked before, the results can be a bit mixed and we don’t want folks to go hungry if we screw up.

Everyone’s been nice about it so far, anyway.

In an attempt to get everything ready CLOSE to the right time, we did as much mise en place before we started cooking as we possibly could.  It really did speed things up later on.

Mise en place

OK, so let’s get the colossal failure out of the way first – it’s the dish we started earliest, so chronological order would put it here anyway. Specifically, we failed to make uttapam, a kind of fluffy pancake-like bread made with fermented rice.  It would be perfectly normal to make this with a mix, just like you would use boxed pancake batter, but we decided to go whole hog and start from scratch.

As mentioned above, Uttapam uses the same batter as dosa and idli, a different fluffy bread from southern India.  The batter is made from fermented rice and lentils, so first both need an overnight soak.

Soaking rice and lentils

In addition to parboiled rice, the bowl on the left also contains rice flakes and fenugreek seed. Depending on who you ask, the rice flakes either help with fermentation or texture.

After the overnight soak, both bowls get blended, and I think here is where I went wrong.  If you watch videos of this process online, typically, this is mixed in an actual blender, not just a food processor.  The lentils should be blended smooth, and the rice to “a little bit grainy.”  The lentils were fine, but the rice…

Blended rice

…well, it’s a bit hard to see in the picture, but the texture we achieved was a bit more than a little bit grainy.  It was a LOT grainy.  And the grains were pretty big.  But never having made this before, when I started hitting a point of diminishing returns with the food processor, I stopped.  Bad choice.  In hindsight I should have just let the sucker run for a LOT longer, or busted out the immersion blender.

But we didn’t know at the time that we were already hosed, so into the Instant Pot it went, with our non-locking lid that we bought two years ago and have never used. And for the first time, we pressed the “yogurt” button!

Yogurt button

Always exciting to press a new button.  After ten hours fermentation, it was a BIT bubbly, but hadn’t increased much in volume at all.  But we gave it a try anyway.

To make uttapam, you spread the batter on a cooking surface, like a griddle, top it with veggies, and when it’s cooked on one side, you flip it over.

Yeah, about that…

Failed uttapam

They never cohered into a solid mass, so when we attempted to flip them over, it was like trying to flip over a cup of beads – there was no cohesive structure, just a pile of rice bits.  An absolute mess.  I did sample one, and they didn’t taste terrible, but this is just utterly wrong.

OK, so, our guests are waiting, what else is ready?

Fortunately, our other three dishes turned out fine, if slightly under-documented.  For our lentil dish, we made a lentil dish from Kerala. First, we cooked some split pigeon peas in the Instant Pot.  This is the same lentil as the Gujarati recipe from last week, but this recipe used the genius suggestion of using an inner cooking container, saving us from having to scrub the Instant Pot liner itself.

Lentils in a bowl inside an Instant Pot.

There’s two ways lentil dishes get their individual seasonings – things mixed in during the final cooking of the beans, and a tadka of oil and spices added at the end.  For the in process seasoning, this dish used a paste consisting of coconut, chilis, cumin seeds and turmeric. The tadka consisted of mustard seeds, green chilis, shallots, curry leaves, and dried chilis.

Lentil seasonings

Mix the tadka into the lentils, and that dish is done.

Next up, our side dish, which is arguably more of a condiment than a side – a delicious peanut chutney.  First, you fry green chilis, garlic, and split black lentils, or urad dal. The lentils are there to act as a binder when the chutney is blended.

Chilis, garlic, and lentils cooking.

Next, you roast the peanuts.  Forgot to take a picture of that. Imagine peanuts in the same pan.

Finally, everything gets blended together, for which task the food processor was perfectly adequate.

Peanut chutney

It may not LOOK like much, but it really was tasty, and it had a great kick to it from all the chilis.

Finally, let’s talk about our main dish, Chettinad Chicken. This is a popular South Indian curry originating from the state of Tamil Nadu.  What distinguishes it from other chicken curries is the particular spice blend, or masala, used to flavor it.  We’re doing this right, so we start by toasting whole spices.

Whole spices roasting

Charmingly, the recipe describes “big spices” and “little spices,” with different roasting times for each.  “Big spices” in this case includes whole coriander seed, cinnamon, black peppercorns, star anise, clove, and green cardamom. “Little spices” include cumin, poppy seed, and ajwain.  These get toasted for the appropriate lengths of time, and then blended together to make a lovely smelling mix:

Chettinad Masala

Next, we cook onions for about thirty minutes.  And frankly, they should probably have gotten even MORE time, but we needed to stay on schedule. Once the onions are nice and soft, you put in the rest of your ingredients – garlic and ginger pastes, the masala, tomatoes, coconut milk, curry leaves, and of course, the chicken.

Chettinad chicken cooking

And when it was done, everything came out to the table:

South Indian Meal

Now I will be the first to admit – my plating skills are right down there with my photography skills.  This photograph does NOT do anything in it justice.  Because let me tell you – Chettinad chicken is delicious and we will be making it again.  The lentils had a great bite, and the peanut chutney was spectacular.  We didn’t really need to confirm how much we loved Indian food, but let’s do so anyway – we really love Indian food.

To finish the meal, our guests were kind enough to bring a whole box of beautiful and tasty Indian sweets.

Indian sweets

Aren’t those purty?

Overall, an excellent meal, even with one dish a complete failure.  Only one more compass direction left, so next time we’re off to East India.  Not the East Indies.  That’s different.

Recipes:
Nadan Kerala Parippu Curry (Kerala style lentils)
Chettinad Chicken
Peanut Chutney
Uttapam

International Meals – India, Part 2: Western India

This week, we head to Western India, and the area that was at one time the Mughal Empire.  The pattern from last time of “bread – side dish – lentil  – main” seemed to work pretty well, so we decided to continue it.

First up, bread! This is one of two dishes this week from the state of Maharashtra. Like last time, this is a flatbread, but unlike our northern bread, which used strictly whole wheat flour, this one uses whole wheat, millet, AND chick pea flour.  Which we finally broke down and bought a bag of, because it keeps coming up. In addition to three kinds of flour, this bread also uses three kinds of seeds, two other dry spices, and some aromatics.

Ingredients for dhapate

I will point out that this is also the recipe for this meal with the second shortest ingredient list.  Everything in this picture is chopped and / or measured as appropriate, and mixed together with some water to make a dough.

Dhapate dough

These breads are then shaped into small rounds with a hole in the middle that can be either pan- or deep-fried.  We hate deep frying, so back out with the cast iron it was!

Dhapate cooking

We didn’t manage to produce the most symmetrical little buggers, but close enough.

Moving on, our side dish is from the region of Goa.  Goa was the site of a Portuguese colony from 1510 until 1961, over a decade after the remainder of India gained independence from the United Kingdom.  The cuisine is a fascinating mix of Indian and European influences, and is the home of one of my favorite curry types, the vindaloo. (Literally, “meat in garlic”, but best known for being a very vinegar forward curry.)

But today we’re making Beans Foogath, a relatively straightforward dish of green beans and coconut. The beans are cooked with some dried and fresh chiles, onion, and a comparatively small number of spices.

Green beans cooking

Once everything is a nice bright green, you toss in some grated coconut and water, and stew it until the beans are done but still crunchy.  And that’s it!

Green Beans Foogath

Next up, lentils!  In this case, split pigeon peas, or toor dal, cooked in a style hopefully representative of the state of Gujarat.  The ingredient list on this one is QUITE long.  First, you cook the beans separately to soften them up a bit.  Once they’re close to cooked, you add in ginger, chiles, jaggery (cane sugar), peanuts, kokum, and potatoes, boiled.

Wait – what?  Potatoes, boiled?

Attention recipe authors – please do not bury a process that takes 20-30 minutes in the ingredient list.  Not wanting to delay dinner by another half hour when we already had chicken cooking and bread getting cold, we left out the potatoes.

Please enjoy this picture of kokum, instead.

Kokum and pigeon peas

Kokum is a type of dried plum used as a souring agent in a lot of Indian food.  My understanding, which could be wrong, is that one way to determine how far north you are in India is to check the relative prevalence of kokum vs. tamarind.

At any rate, with the lentils cooking, it’s time to make the tempering – the flavored oil with other spices that is used to season the dish. And here’s the family photo for this step:

Tempering ingredients for Gujarati Dal

More or less clockwise from bottom, we have tomatoes, fenugreek leaf, cumin seed, mustard seed, cloves, dried chiles, fenugreek seed, bay leaves, cinnamon, coriander seed, and tumeric.  These all get fried off together with some curry leaves.

Dal tempering cooking

Once everything is nice and fragrant, the tempered oil and the spices go in with the beans, and that means there’s only one dish left to talk about.

For our main dish, we return to Maharashtra, and specifically the city of Nagpur.  We’re making a dish called Saoji Chicken. Every recipe you find for this dish specifically brings up how spicy it is.  Spicy is fine, but the repeated warnings were a little interesting.

First up, we make a spice paste, or masala, from another huge stack of ingredients:

Saoji masala ingredients

From left to right (more or less), this is sorghum flour, whole mace flowers, kashmiri chiles, black cardamom, black pepper, green cardamom, cloves, star anise, bay leaves, coriander seed, oil cinnamon, onion, ginger, and garlic. Not pictured, but still included, grated coconut and cilantro.  Not pictured and NOT included, poppy seeds and stone flower.

Poppy seeds were left out because we thought we had some, but didn’t.  Stone flower is an interesting one, though.  It’s apparently a lichen used to add flavor to some curries, but we managed to stump the clerk at the Indian grocery store when we asked for it, even when presented with a number of possible different translations.  Apparently it CAN be found if we wanted to drive down to the suburbs and poke about, but it’s hard to imagine the dish completely changing character because we left out one ingredient out of all these.

In order to simplify cooking, we mised some en place to get ready:

Mise en place for masala

These various bits were fried off in sequence.

Masala cooking

Once everything was cooked, it all went into the spice grinder to make a paste, and the aromatics were fried separately.  Finally, the spice paste and the aromatics went into the food processor to make a pastier paste.  Which then had to be fried even more.

We of course tasted it at this point, and the flavor was indeed pretty intense, although I’m not sure I’d say SPICY was the dominant note.  Just really, really complex.  At this point, the chicken was added, tossed with the masala and a little water, and cooked until done.

Two confessions: I forgot to take any pictures of the chicken actually cooking.  You’ll have to wait for the final meal picture.

Second confession: I bought boneless chicken thighs.  I KNOW the bones add flavor, but sometimes I just don’t have the spoons to deal with them.  Or the knives, to be more accurate.  At any rate, after 25 minutes or so, the chicken was done, and it was time to bring everything to the table.

West Indian Meal

And here we are! Dhapate, Foogath Beans, Gujarati style dal, and Saoji chicken, along with some basmati rice and a Kingfisher, which according to the bottle is “India’s Premium Beer”.  Also according to the label, this one was brewed in the UK.  Oops.

At any rate, how was it? Excellent!  The bread was a BIT chewy from being made several hours in advance and cooling, but it had a nice spice mixture, and it was perfect for soaking up the sauces.  The green beans had plenty of personality from the simmering with the spices and the coconut.  The dal was interesting – the peanuts gave it a bit of a crunch, but based on the descriptions I have read of the flavor, I suspect it needed a bit more sugar.  And the chicken was delicious. All that complexity really shone through in the masala.  My only complaint is that the amount of masala generated by the recipe could easily have seasoned twice the volume of chicken, and then we’d have had leftovers.

So with two down and two to go, our hurtle around India is a great success so far! Next up, the south!

Recipes:
Goan Style French Beans Foogath
Dhapate
Gujarati Dal
Saoji Chicken

International Meals – India, Part 1: Northern India

India. Wow.  OK, Let’s do this.

For the most part, this project has involved one meal per country, on the assumption that there are a metric crapton of countries, and we’re not likely to finish this under the BEST of circumstances.  But we’ve made a few exceptions.  China got five meals, and France got two.

There was NO way that India was going to get squeezed into one meal.  The plan is to do four, and even that is absurdly reductive.

Now the other thing about Indian food is that we make it all the time.  It is one of our favorite cuisines, and it is telling that despite the fact that all four of these recipes have quite long ingredient lists, we only had to buy one spice we didn’t already have. (More on that later.)  If you need a good starting point, may I recommend 660 Curries by Raghavan Iyer.  Despite the clickbait-y title, it’s a fantastic introduction / reference book, and does a good job of spanning a broad gamut of Indian recipes.

But given that we make Indian food a lot, we want these meals to be a bigger deal than our normal outings.  So we selected no fewer than four dishes – a bread, an appetizer, a lentil curry, and a lamb curry.

Let’s get to it, shall we?  I’ll talk about the dishes one at a time, rather than the frantic back-and-forth that actually happened as we tried to get all four of these to the table at approximately the same time.

Starting with the bread.  India has a wide variety of breads, and we originally wanted to pick one from Rajasthan, as that state is not otherwise represented in this meal.  But it turns out the quintessential Rajasthani bread, Khoba Roti, is fussy as all get out, and would be a project all by itself.  Pretty, though.  So instead we went with Missi Roti, a flatbread from Punjab made with a mix of whole wheat and chickpea flour, onions, chiles, and ajwain seeds.

Chickpea flour is something we just don’t quite use often enough to justify the storage space, but fortunately, it’s really easy to just put chickpeas in a spice grinder and make your own.
Homemade chickpea flour

The Indian grocer I visited had whole wheat flour (which they literally referred to as “Roti Flour”) in bulk, so we didn’t have to commit to several pounds of that. The various flours got mixed together into a dough, along with chiles, onions, the ajwain seeds, and a pinch of asafetida (which is technically a resin, but we don’t stand on ceremony here).

Unmixed roti dough

After a bit of a rest, the dough is rolled out:

Rotis being rolled out

And finally cooked. Lacking a tandoor or a tawa, and not wanting to set off the smoke alarm like the LAST time we tried to make flatbreads in the apartment, we opted for cast iron on the grill.

Roti cooking

One down.  What’s next?

Our appetizer was Paneer Tikka Kebabs, or “spiced cheese on sticks” if you like. Everything’s better on a stick, right? Like the roti, this particular variant is from the Punjab region. We hope.

This recipe definitely epitomized the long ingredient lists for today’s menu.  Here’s just the spices for the marinade (and not even all of them).

Paneer Tikka marinade ingredients

Paneer Tikka Marinade. From left to right: coriander seed, Chaat masala, Garam masala Kashmiri pepper powder, oil, fenugreek leaves, ginger paste, garlic paste. Not Pictured: red pepper powder, mint, cilantro, lemon juice. yogurt.

I’d like to point out that a) the Chaat Masala and Garam Masala are both spice blends, so the actual ingredient list on this marinade is substantially longer and b) we already had every single item in this picture on the shelf.

So – mix everything up to make a marinade, and then donk in the paneer and some veg to soak.
Paneer marinade.

This actually happened several ours before the main orgy of cooking, so I had time to come back to my chair and sit down for a while.  Or at least, I WOULD have…

Orange cat in a chair.

Blep.

No chair for you.

The actual cooking process for the kebabs was simple. Bake for a bit to cook the cheese, then broil a bit to crisp the outside. Longer broiling would have been desirable, but again, there were smoke alarm concerns, and we had already shut off the grill.  Next time.

On to the dal.

This recipe claims to be from Uttar Pradesh, the most populous state in India, adjacent to the capital, New Delhi.  It uses split chick peas (chana dal) and split black lentils.  (urad dal, which are actually white if they’ve been skinned.)  In addition, it uses spinach, onion, tomatoes, and another long spice list.

Spices

When we did our Ethiopian meal, we used the pressure cooker as a shortcut for one of the dishes, but it wasn’t necessarily an authentic preparation. Indian cooking, by contrast, uses pressure cookers as a staple technique. The only difficulty is that many traditional recipes will say things like “cook to the third whistle.”

Our Instant Pot doesn’t have a whistle, so we just took our best guess.

At any rate, first the spinach is blanched and pureed:

Pureed spinach

Growing up, pureed frozen spinach was the only way I ever encountered the vegetable, so I’m a bit wary of this – grown up Dan much prefers whole leaf spinach, prepared by being waved around in the same room as some boiling water for 20 seconds or so.  However, it turns out that pureed fresh spinach is still much tastier than the frozen kind.

The sautee function on the Instant Pot is used to brown some onions, and then soften up the vegetables and lentils a bit.

Vegetables and lentils cooking

Next, in with the spinach, seal the lid, and let it cook for a few whistles. Or seven minutes.  Whatever.

Spinach added to the Instant pot

A common feature of a lot of Indian lentil dishes is a tadka, or tempered oil.  You cook the lentils and veg in one pot, as above, and then in a small separate pan, you cook spices in oil to bring out their flavor and season the oil.  The tadka for this recipe is a bit unusual in that it involves garlic, which would more commonly be cooked with the beans (or not used at all).

Tadka ingredients

In addition to the garlic, this tadka also includes green chiles, cumin seed, and more asafetida. These were cooked in some clarified butter (ghee) and then added to the lentils when they were done.

Whew – one more dish to go!

Kashmir is the region on the Indian border with Pakistan.  There’s… a lot of history there from the last hundred years, most of it awful, and most of it the fault of the British.  For more information, consult the historical documentary, Ms. Marvel. (Sorry, that was in poor taste.  Do educate yourself, though.) (Also watch Ms. Marvel – it’s great.)

Our reading indicated that if any one dish could be pointed to as the “national” dish of the region, it would be Rogan Josh, a curry whose name literally means “hot oil.”

Here we had to make a few compromises.  The recipe we picked insisted that bone-in lamb was important.  However, when I went out shopping the morning of, my choice was frozen bone-in lamb, which would either involve defrosting (time consuming) or microwaving (not great), or else boneless lamb chunks which were already defrosted.  We went with B.

Next compromise – the distinctive red color of Rogan Josh does NOT come from tomatoes, and the author of the recipe was explicit that if you attempted to put tomatoes in this recipe, she would come to your home and beat you around the head and shoulders with a lamb shank.  Ahem. She was explicit that it would not be traditional, but would still probably be tasty.

But we’re going the extra mile today, so I attempted to acquire one of the traditional ingredients used for the color, either Ratan Jot, a dried leaf, or Mawal, a dried flower.  The store had neither in stock, but they did have Ratan Jot powder, so that’s what we got.

To actually make the dish, the lamb chunks are first browned, then removed from the pan.

Lamb chunks

Next, another long list of spices and aromatics is toasted in the same oil, including black cardamom, cinnamon, black pepper, Kashmiri chili, powdered ginger, garlic paste, ginger paste, and coriander. Finally, the lamb goes back in with yogurt and some water, and then goes on the simmer for ninety minutes or so.

Lamb simmering

That’s quite red, but it’s just not red enough. No, now it’s time to add the fancy Ratan Jot from above.  Problem: the recipe assumes you have the leaves, and we only had the powder.  So we took a page from a number of recipes in the Iyer book mentioned approximately 600 paragraphs ago (this WILL all be on the quiz). To infuse oil with powdered spices without burning them, we heated the oil first, then shut off the gas and put the powder into the hot oil to be cooked by the residual heat.  Was this right?  Did we use enough? No idea!  But it certainly was a striking color.

Adding oil to lamb

With the lamb, bread, dal, and paneer all done, it was time to eat!

Northern Indian Meal

My food porn game is not strong, but holy cow was this good.  There’s a REASON we make so much Indian food, and that reason is that Indian food is f*ing tasty.  The paneer had a serious kick to it, the lamb was meltingly tender, the spinach was a great vehicle for the lentils without being gummy, and the bread was perfect for shoving everything into our faces.

We am looking forward to the next three meals, for sure.

Big thanks to my friend Natarajan for his help with how to conceptualize this part of the project.

Next up – more India!

Recipes:
Kashmiri Rogan Josh
Paneer Tikka
Missi Roti
Satpaita Dal

International Meals – Iceland

Not only is Iceland a place we’ve been, Iceland is even a place we’ve documented on this very blog! It’s true. You can read about our misadventures across the island starting with this post.  We saw lots of geology, ate lots of food, and failed to correctly pronounce a LOT of words.

While we were in Iceland we did NOT try their perhaps best known delicacy: hákarl, or fermented shark.  So after a bit of discussion (spoiler: this is not true), we decided that it was essential that we ALSO not try it for this meal.  Why break a streak?

Instead, it seems the most quintessential Icelandic dishes we WERE willing to have a run at all involved either fish or lamb.  And after discovering a delightfully tounge-in-cheek recipe site called “The Icelandic Food Centre” (actual motto: “Please read them, we beg of you.”) we decided that their recipe for Plokkfiskur would be just the thing. Accompanied by Rúgbrauð, of course.

First, a quick trip to the grocery store for some ingredients.  We were going to need several different types of dairy, some spice cookies, and something called golden syrup, which apparently sometimes comes in a can with a dead lion on it.

In the immortal words of the folks at the Icelandic Food Centre – “What the hell, Lyle?”

Amazingly, our local grocer had both Kefir and Skyr, neither of which we had ever purchased before, but there they were.  In researching spice biscuits, I also learned that “Biscoff” is actually short for “Coffee Biscuit.”  Who knew?

So let’s start with Rúgbrauð.  What’s Rúgbrauð? It’s a very dense, sweet, dark rye bread.  In Iceland it would traditionally be cooked in a geothermal hot spring.  If you don’t have one of those in your basement, (we don’t, I checked) then there’s two ways to make this bread – you can either steam it for a long time, or bake it for a VERY long time.  Since the latter method had less room for the undesirable failure mode of cooking off all the water and then setting off the fire alarm, we went with that one.

The recipe is simplicity itself – mix a LOT of rye flour with a little wheat flour, add in some baking soda and kefir for leavening, and golden syrup for flavor and color. Done. When we purchased this bread in Iceland, we were warned not too eat TOO much of it at one time, due the QUITE high fiber content.  With a 2:1 rye to wheat ratio, I can see why.

You bake it in a Dutch oven for 400 degrees F for half an hour, and then lower the heat to 200 degrees for the rest of the day.  It turns a lovely color by the time you pull it out.

Bread accomplished, let’s make our Plokkfiskur! Plokkfiskur, it turns out, is a traditional cod and potato stew, seasoned with just white pepper and salt. However, according to the nice folks at the Icelandic Food Centre: “Feel free to do whatever you want. Like putting Szechuan peppers in, using cream or grilling a T-bone steak instead.”

We appreciate the freedom, but we decided to stick with the traditional approach.  So we started by boiling some potatoes and (in a separate pot) cod fillets.

Not the most colorful of ingredients, but let’s see what else we’ve got. Hmm… butter, onions, flour, salt, and white pepper.  Quite the monochromatic dish.  Once the cod and potatoes are ready, you make a quick béchamel with onions, butter, and flour.

As soon as the onions are translucent, you pour in some milk, and then add your cod and potatoes.  Everything gets mushed up together.

Finally, you season with white pepper, which we should really get a GRINDER for one of these days, since we use it so much.

And that’s the meal! Fish stew and rye bread, with a nice Icelandic stout (Alcohol content: rather a lot) on the side.

Simple food, but SO good!  Fresh cod and pepper make the stew really pop, and the bread was sweet and chewy, and perfect covered in butter. This would be a good weeknight meal, and a less good meal heated up in the office microwave the next day.  But it turns out it’s delicious cold, too, so I was able to spare my coworkers that experience.

“But wait,” those of you keeping score at home may be asking, “What were the skyr and the biscuits for?” I’m glad you asked me that, fictitious narrative device person!

Actually, not all that glad, since although we made a cheesecake, it could have turned out better.  To make the crust, we ground up a whole bunch of spice biscuits with butter.  So far, so good.

Next, we whipped sugar, and double cream.  And here’s where we went wrong.  I’m always afraid I will overwhip cream, but in this case it was absolutely essential to go full glossy stiff peaks.  Unlike a traditional cheesecake with cream cheese, which is solid at room temperature, the ONLY structure in this cake comes from the whipped cream.  Once the cream is beaten, you fold in the skyr, and spread that over the crust.

And that’s it – you chill the cake for a few hours or overnight, release the spring form, and then like an idiot, attempt to remove a slice of what turns out to be a runny sweet cheese blob BEFORE you snap a picture.

It still tasted great, but trust me – if you make this one, don’t underwhip.

Iceland, your food was great in person, and it was great at home.  Who needs trees, amirite?

Next up, a tiny, tiny country, with a basically monolithic food culture.  Shouldn’t be any problem at all, really.

Recipes:

Plokkfiskur – Cod and Potato Stew
Rúgbrauð – Icelandic Rye Bread
Skyrterta – Skyr Cake

International Meals – Hungary

As the world slowly returns to – well, not normal exactly, but at least begins providing us with more options for things to do OTHER than cooking, these meals are probably going to slow down to something closer to their pre-pandemic pace.  We’ll see.  With Guyana still on hold for the time being, next up was Hungary, which meant it was time to return to my friend Walt, our expert on all things eastern European.

Because this is so tightly in his wheelhouse, there weren’t actual recipes, per se.  Rather there was a long phone conversation where Walt described his process for making these dishes, and I tried to take careful notes.  Then there was some more back-and-forth via Facebook.  And maybe a panicked phone call or two.   Maybe.

At any rate, we started the day with some baking.  I found a recipe online for a Hungarian country loaf.  Fairly simple – yeast, flour, water, salt.  But it turned out to be a monster of a product:

Hungarian bread

I don’t know what caused that line around the bottom, other than possibly steam from the shortening we greased the pan with.

Baking takes a while – by the time this loaf was done, it was already early afternoon, and we had another baked good to produce.  Our Hungarian dessert was a roll similar to the one we made for Croatia, but with a poppyseed, rather than walnut, filling.  Which segues nicely into our trip to the deli.

Walt was very adamant that high-quality paprika was critical for our main dish, so we found an incredibly long and narrow European deli that had paprika that met with his approval.  While we were there, we picked up a can of poppyseed filling.  Also pictured, lard.

Those of you who know your flags may have twigged that this poppyseed filling is actually Polish.  I’m sure it’s fine.

The dough process was the same as the Croatian one – a very slow addition of flour to the fat and liquid that took half an hour to eventually come together.  Since we ended up with more dough than filling, we made two small rolls that were DEFINITELY not authentic – one with butter, sugar, and cardamom, and one with cloudberry jam.  (Thanks, IKEA!)  Authentic or not, they were tasty.

For some reason, the rolls puffed up a LOT more than the Croatian ones did:

With our baked goods out of the way, it was time to finally start in on our main dishes -chicken paprikash, dumplings, and a cucumber salad.

The last was quite simple.  Slice a cucumber paper thin, then combine with an onion, vinegar, and a little paprika.

Sliced cucumber
But that one onion was just a tease.

Walt’s recipe for paprikash involves… rather a lot of onions.

To start, you brown bone-in, skin-on chicken in lard or smoked bacon fat.

Browning chicken

Then, you combine the chicken with an equal weight of onions. We had about 3 lbs of chicken, so here’s what an equal weight of onions looks like.  Rice cooker for scale.

I was NOT a happy camper after chopping up that many onions, but we got it done.

The really amazing thing about this recipe is that there is no other liquid OTHER than what sweats out of the onions and the chicken.  Most paprikash recipes you find online call for stock, tomatoes, or other additional liquid.  Not this one!

Onions, chicken, a single bell pepper, and seal the pot.  Fortunately, we had a Dutch oven with a nice heavy lid to hold everything in.  Halfway through cooking,, it was time to dump in a whole bunch of paprika.

By this point, there was plenty of liquid in the pot, but the eventual goal was to have the onions completely dissolve.  After an hour, they kinda hadn’t, so I called Walt.  He gave me two suggestions.

1. Pull the chicken out so it doesn’t overcook.
2. Use an immersion blender to cheat.

So that’s what we did.  Chicken to one side, we went in with the immersion blender to deal with the remaining solid pieces of onion.  To finish the sauce, we tempered some sour cream, by mixing in some of the hot onion liquid, then poured that back into the pot.

Pretty, innit?

For our side dish, we made nokedli – simple egg and flour dumplings.  After you mix up a batch of batter and let it rest for a bit, you donk it a half tablespoon at a time into boiling water to get irregular little chewy tasty bits.  It’s a similar technique to spaetzle, but a bit more irregular.  Then again, our spaetzle were pretty dang irregular too.


And with the dumplings done, we had our meal – paprikash, nokedli, cucumber salad, bread, and a nice Hungarian wine we found at our neighborhood liquor store.

This was REALLY tasty.  Allowing the sauce to come entirely from the onions gave it a much richer flavor than it would have had if we’d tried to hurry things up with stock.  The dumplings were great at soaking up the sauce, and the cucumber salad was a lovely contrast.  Overall, a delightful meal.

For dessert, the poppyseed roll, which also turned out delicious.

We’re so grateful to Walt for sharing his expertise.  Our next trip to the area is for Kosovo, so that’s not for a little while.  But it’s always great to be eating family recipes from a friend!

Next up, either Guyana or Iceland!

Since the recipes were basically notes I typed up from a phone conversation, I’ll just include them here rather than linking. The bread we made was this one.

Chicken Paprikash

* 1.5 kg or so whole chicken legs or thighs (with skin & bone)
* ~2 tbs Smoked bacon fat, chicken fat, or lard (sufficient for browning)
* 1.5 kg or so of yellow or Spanish onions (same weight as chicken)
* 1 clove garlic, mashed
* 1 red bell pepper or long sweet red pepper, thinly sliced
* 3 heaping tbs Hungarian sweet paprika
* 1 cup sour cream
* Salt to taste

* Season chicken with salt (not black pepper)
* Brown chicken in fat. (Skin side down ~6 minutes, skin side up ~3 minutes)
* While browning, thinly slice onions pole to pole.
* Add onions and chicken to pot. Cover tightly, cook on low.
* Halfway through (about 25 minutes), add garlic and red pepper.
* Remove from heat, add paprika
* Return to heat on low
* Cook until chicken is done. (45 minutes or so)
* Remove chicken from bowl and cover to keep warm
* Add 1 cup sour cream to some of the liquid to temper it, then pour back in.
* Simmer on low heat until onions are completely dissolved, or use an immersion blender to hurry things up.
* Return chicken to pot, taste and adjust salt

Nokadly dumplings

* 2 eggs
* pinch salt
* water
* All purpose flour

* Beat eggs with a pinch of salt, using a fork.
* Add a little water, then flour by the tablespoon to make a soft dough – closer to bread dough than pancake batter.
* Cover and let sit for a while.
* When chicken is ready, boil salted water.
* Using a wet teaspoon, dip 1/2 tsp of dough into water.
* Cook for a few minutes until done.

Uborka Salata

* 1 cucumber, sliced very thin
* 1 yellow or Spanish onion, sliced paper thin across equator
* salt
* paprika
* Dressing:
* White vinegar
* Water
* pinch of sugar
* small amount of sour cream (optional)

* Peel and very thinly slice cucumber
* Sprinkle with salt and allow to sit for about half an hour to draw out water
* Drain, and mix with onion
* Dress and top with paprika


International Meals – Honduras

“Did we… did we just make tacos?”

A recurring theme of this project is trying to figure out what makes a country’s cuisine unique.  What can we make that is uniquely Albanian, rather than Macedonian?  What separates Eritrean food from Ethiopian?  Where can we get the right kind of caterpillars for Burkina Faso?

Wait, no – ignore that last one.  We didn’t make caterpillars for Burkina Faso, and we’re not making fermented shark in two meals from now.  We’re adventurous, but there are definitely limits.

So for Honduras, we instituted our usual stringent research program of making half-assed internet searches. And in this case, we found recipes that claimed to absolutely be Honduran.  Some were even from an official government tourism website.

But… they didn’t seem to be dramatically different from the food of other central American countries.  Costa Rica has Salsa Lizano.  El Salvador has pupusas.  Honduras has… refried beans?  Well, OK – we LIKE refried beans, let’s see how this goes.

For our main dish, we’ll be making carneada, which is grilled flank steak marinated in bitter orange juice.  For our last country, Haiti, we managed to snag the last of the season’s fresh bitter oranges from Granville market.  This week, I realized we needn’t have gone to QUITE so much effort:

Bitter orange juice

Turns out you can just BUY the stuff in a bottle.  Still, I’m sure fresh juice didn’t hurt, and the Haitian meal was delicious.  Let’s see how flank steak soaked in the stuff turns out. The marinade also contains garlic, olive oil, cumin, and Worcestershire sauce.  Not having any of that last, we just pulled out the aforementioned Salsa Lizano.

Marinating meat

Next up, beans.  First, the all-important sofrito.  This one is bell peppers, garlic, and onion.

Sofrito

Next, after blending up cooked kidney beans in a blender, they get dumped into the pot and, well, re-fried.

Refried beans

It was at about this point that we realized I had cut the meat into pieces too small to grill. “Cubed steak” means something different than “steak cut into cubes”, as it turns out.  Fortunately, there’s a device invented for the express purpose of cooking small pieces of meat on a grill.

Steak on skewers.

This is pre-grilling – that color is entirely from the marinade.

Just two more things to make – tortillas and chimol, which seems to be another word for salsa.  Tortillas are in principle simple – masa flour, water, and a little salt.  Roll out, and dry fry.  We got about six done before we set off the smoke alarm, so that was about it for that.  Living in a high-rise as we do now, the last thing we wanted to do was trigger an evacuation of the whole building.

The chimol was onion, pepper, tomato, cilantro, lime juice, and salt.  So yeah – salsa.  But, you know, we like salsa.

And here’s the final meal:

Honduran meal

Beans, meat, salsa, tortillas.  What’s not to like?  The meat, in particular, was extremely flavorful.  I do wish that I had realized that “cubed” means “hit repeatedly with a spiked mallet,” because a) that sounds AWESOME, and b) the meat was still a bit chewy. The combination was, however, delicious.

And yet…

It still bothered me that we had basically grilled steak, and made salsa and refried beans.  Wasn’t there something more… Honduran we could do?

After some more reading, I discovered that one more dish that is strongly associated with Honduras is baleadas. The urban legend is that this dish is named for the corner where a street food vendor was shot. “Adonde la baleada” means “where the shots were fired,” so “baleadas” is basically “bullets.”

And what is this dramatically named dish?

Refried beans.  In a tortilla.

Well, we still like refried beans, so let’s give it a shot.  The version we’re trying this time is from the blog of a Honduran immigrant to the US, and starts by charring the daylights out of some onion:

That’s blended with the beans and some cumin and refried, and that’s it.  The other two mandatory toppings are cotija style cheese and Honduran crema, which we made by mixing sour cream with heavy cream and salt. They are served on the fluffiest available flour tortilla, as distinct from the corn tortillas from the first dish.

Baleadas

So – beans, cheese, crema, hot sauce.  Again, what’s not to like?  This dish actually DID seem a bit more unique, if for no other reason than you really could taste the charred onions, and the salty crema was a bit different.

And to be 100% clear – the fact that these dishes don’t seem super unique is down to OUR shoddy research.  I’m sure there are more distinctive elements of Honduran food culture that we just didn’t find.  Also – this stuff is DELICIOUS, so who cares if it’s not caterpillars and shark?

Honduras, you make tasty food, and don’t let anyone tell you different.

Next up, either Hungary or Guyana, depending on stuff.

Recipes:

International Meals – Haiti

It’s ironic – in 2020 and 2021, we started making a lot MORE international meals because the pandemic meant we has lots of free time on our hands.  But we’ve been on pause for a bit BECAUSE of the pandemic.  Or maybe that’s not ironic – that may only apply to black flies on your wedding day or something.

Next up was supposed to be Guyana, and we were looking forward to sharing the meal with one of my coworkers from that country.  However, Omicron came along and shut everything back down again.  At which point we just threw up our hands and took a break.

But we’re back now. We’ve stuck a pin in Guyana for the time being, and we’ll come back to it when we are able to get together with my friend, but for today, let’s talk about Haiti!

Haiti is a country which featured the first successful slave revolt in world history, and has then been systematically screwed over by the world community, the natural environment, and in some cases, its own leaders ever since.  The “No Reservations” episode on Haiti is particularly gut-wrenching.

On the other hand, the MEAL we made from Haiti was anything but. To start, we had to plan a week or so ahead and make pikliz.  Pikliz are apparently THE absolutely ubiquitous condiment on Haiti. They’re very simple – shred some veg, pack in vinegar and wait.

Oh – and make sure to include a truly dangerous quantity of Scotch bonnet  peppers.

Pikliz in process

These are going to be a recurring theme, contained as they were in literally every dish on the table.

A week later, we were ready to.. well, start marinating things for the following day.  The two leading contenders when you search for “Haiti national dish” are Pork Griot and a version of rice and beans called Diri Kole. Marinating for the latter just involved putting beans in a bowl of water overnight.  (not pictured)  Not having any small red kidney beans on hand, we used Adzuki beans.  I’m sure it was fine.

Next up, the pork!  Pork Griot is a recipe that involves marinating pork in citrus and spices, then boiling it to cook the pork, and finally either deep frying (traditional) or baking (for those who hate deep frying) the chunks to crisp them up.

So lets start with the marinade, at which point we immediately have to back up a step and make green sauce.  Haitian green sauce, or Epis, is similar to the green sauce we bought for Grenada, but substantially spicier.  What with the Scotch bonnet peppers and all.

Green sauce ingredients

And here’s the green sauce ingredients – scallions, thyme, olive oil, parsley, shallots, celery, red pepper, and don’t think we don’t see you hiding there, hot pepper.  We see you.  This just goes in a blender.

Next up, the actual marinade, which includes a bit of the green sauce along with all this stuff:

Pork marinade ingredients

So here we have oranges, limes, parsley, thyme, and scallions. But we need to talk about those oranges.  Those are Seville, or bitter oranges, used primarily for making marmalade, and only available fresh a small part of the year.  We were lucky enough to catch the very tail end of the season and raid the last of the stock at Granville Island. Juice, chop, stir, soak.  Here’s a picture of the marinated pork chunks ready for boiling the next day.

Marinated pork chunks

The recipe doesn’t call for any additional liquid.  I was certain we’d have to add more to keep it from drying out, but nope – with the lid on, more than enough liquid sweated out to keep everything nice and hydrated.

While the pork was boiling, we made rice and beans.  First, the beans get a nice long boil with a little garlic.

Boiling beans

Next, and this is definitely a first for me, you SAUTEE the cooked beans in oil.

Sauteeing beans

Once that’s been going for a bit, you go in with onion, garlic, and some seasoning, including a very healthy dollop of green sauce.

Seasoning the beans

The final mixture, once cooked a bit, smells amazing.  The next step, according to the recipe, is to mix this with rice and cooking liquid (reserved bean water), and then very carefully cook just until all the water is absorbed.

Pfft.  Who needs careful?  We have a device that has literally no other purpose than to shut off when all the water is absorbed.

Rice cooker

I will never apologize for using this thing.

At this point, the pork was nice and tender, so it was time for deep frying!

No, just kidding. To hell with deep frying. Time for baking!
Baked pork chunks
Just LOOKING at this picture is making me hungry again. The smell was amazing.  By now, the rice, which was JUST BARELY contained by the cooker, was also done.

Cooked Hatian rice and beans

Yes, that’s another whole Scotch bonnet.  Did we forget to mention that? Anyway, here’s the final plate:

Hatian meal

Rice and beans, pork, and a big pile of pikliz.  How was it?

It was unreal.  As long as you could handle the heat, this was a stunning meal.  The pork was crispy on the outside, tender on the inside, and had just the right amount of fat to be delicious without being too greasy. The beans and rice were extremely flavorful, and the pikliz were amazing.  But, and I can’t stress this enough, this is one of those plates where you really want to get a little of everything in each bite.  At that point, the spicy / sour / salty / meaty combination just blows the doors off.

Haiti, you been done dirty your whole life, but you still have some amazing food.

Next up, Honduras!

Recipes: